Can you feel it in the air? The feeling of love... for makeup!! Regardless of whether you're in any kind of romantic relationship or not, it's important to see every holiday from a gal's point of view– It's an occasion to dress up! The best gift you can give yourself for Galentine's Day is the gift of feeling cute. In this tutorial, Papillon Beauty Pro Kitt shows us how to do just that.
Read on to see how you can achieve this look!!!
Hello everyone! Kitt here!
Hope you are enjoying your Valentine's Day, whether it is being spent snuggled up close with your significant other, making it a day to show your friends and loved ones that you truly love and cherish them, or even taking that bit of extra time that you may not normally take to give yourself that extra bit of self-love and pampering that you deserve after all the hard work of leaving 2021 behind us!
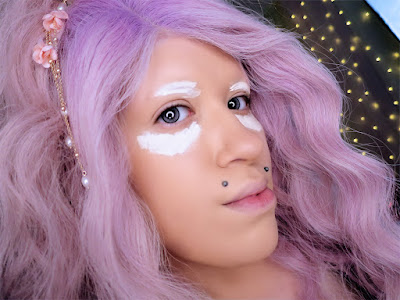
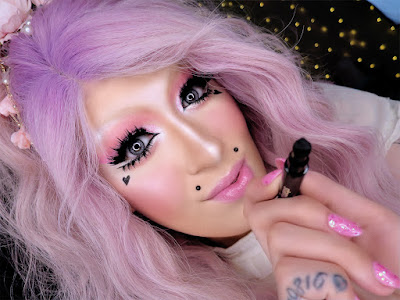
I wanted to create this soft pink inspired Galentine's look for you all, that is super sweet and sexy! The main features of this eye look, is using a bit of shimmer in all the right places, to really highlight your eyes and give your Gal makeup a super flirty and romantic feel! Create a look that's just a little bit sweet, and a little bit MORE.... SEXY!! Use glitter liner to create shiny tears that glisten in the highlights of your eyes, and sparkle in the romantic candle light like shiny sapphires in the dark.
🦋 Galentine's Makeup Tutorial
Save the spread for later viewing or scroll down for a step by step guide! Don't forget to take a look at last years Galentine's Lookbook for more inspo!
🦋 Galentine's Makeup Tutorial Step by Step!
Step 1
Apply your favorite full coverage foundation. I used Tarte's Amazonian Clay Foundation. It's great for oily or combination skin like mine. It looks super smooth over all of my pores and fine lines as well.
Step 2
Use a lighter shade of concealer to highlight around your eye area. I used the Huda Beauty Overachiever concealer in the lightest shade Whipped Cream. Blend in your concealer.
Step 3
Set your face with a translucent powder to keep your makeup from creasing. I set the concealer under my eyes, forehead wrinkles, the smile lines around my mouth, and any area of my face that I feel gets a bit greasy throughout the day like my chin and t-zone area.
Step 4
Add Bronzer to your cheeks. I have been loving this gorgeous Leopard Print Bronzer from W7 called Africa. This bronzer is very warm toned and has shimmer and pink swirls mixed in so it acts like a blush and bronzer 2-in-1 when you mix the colors together.
Step 5
I use a matte powder bronzer in a cooler toned “contour” shade to create a shadow on the areas of my face I want to “slim”. For example: along the sides of my nose, jaw-line, and sides of my forehead. This is the Chocolate Soleil Bronzer from Too Faced that I use through steps 5-8.
Step 6
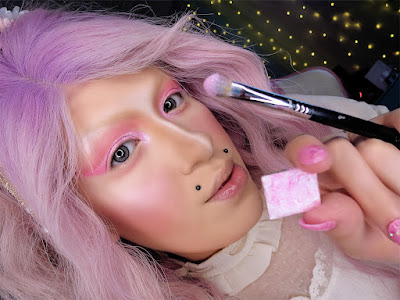
I use bronzer to achieve my nose stripe, with a flat topped contour brush. This one I used is from Unicorn Cosmetics.
Step 7
For doing very light “blonde” looking natural eyebrows, I blend my bronzer powder up into where I want to draw on brows. My eyebrows are naturally shaved.
Step 8
I use an eyeshadow brush to shade and emphasize my namida bukuro (tear bags) under my eyes. Later we are going to take a lighter shade to highlight the white part we left inside, so don't worry about being to precise right now.
Step 9
After my face has been set with powder, I wipe off any foundation or concealer that may have gotten on my lips, and will put on either a lip plumping gloss or lip oil to moisturise my lips so they don't look dry and flakey.
Step 10
I use the NYX Jumbo white Milk Pencil to draw a skinny stripe as the center of my nose highlight. You can set it with a matte white eyeshadow, or a shimmer if you prefer. But only tapping very lightly and don't rub, or this can rub off your foundation when you draw on using cream products over top of your powder. So proceed with caution!
Step 11
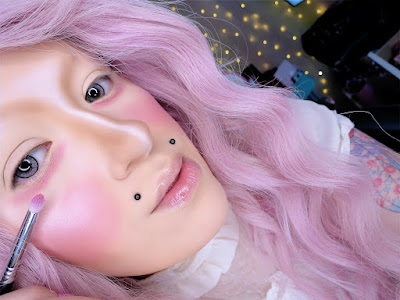
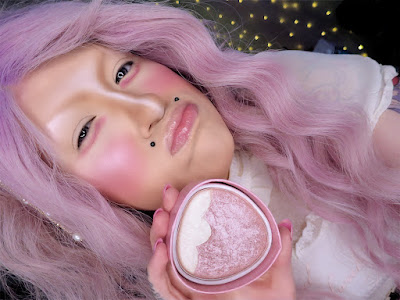
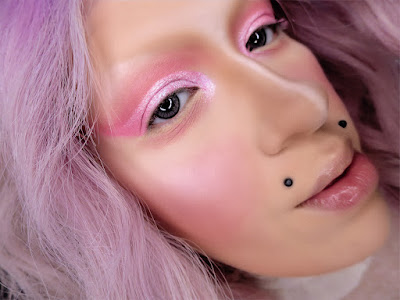
I use Ofra Highlighter in shade Pillow Talk which is a pretty soft pink shade. I highlight the tops of my cheek bones as well as underneath the outside half of my eyebrow. I don't put highlight under the front half of my brow. I use a very small eyeshadow blending crease brush to do this step.
Step 12
In the next steps 12-15 I use the Jaclyn Cosmetics Rouge Affair Blush Palette. I use it on my cheeks and as eyeshadow as well!
Step 13
I place the pink blush shade called Fantasy over top of the namida bukuro line I mapped out with my bronzer before. This was just a guideline.
Pro Tip: Using the same color whether it is bronzer or blush, you can blend matching bronzer or
blush in the crease of your eyeshadow to give your make-up an over-all cohesive look, to tie in
colors that work together. Another trick is if you're using a cream blush, you can also take it one
step further and use the cream blush on all 3 your eyes, lips, and cheeks! Makeup artists use this
technique a lot in make-up for photoshoots and runway shows.
Step 14
Lately I have been loving using a shimmer blush/dark peachy highlighter in the middle of my highlight and blush to take it a step further. Using this third mid-tone shade, really helps blend the two extreme colors together, and to create more of a seamless blend and gradient between the 2 colors that looks more natural. I use a fluffy bush brush to do this so it's not as precise and blends more.
Step 15
Starting from Darkest to lightest, I use a graduation of pinky/peach shades from my Jaclyn Cosmetics Rouge Affair Blush Palette. Starting with the darkest shade Forever in the crease, then using a medium pink shade Fantasy that I used as blush on my cheeks. Then at the top of my brow bone, I blend the lightest pink shade Admirer.
Step 16
I use P. Louise Pastel Baseic in shade Winter Rose on a super thin, flat concealer brush to carve out the cut-crease shape I want on my lid. I set it with a tiny bit of translucent powder to keep the liquid from creasing.
Step 17
I use one of my favorite Multichrome Glitter Pigment shades from Clionadh Cosmetics in the shade Kaleidoscope to set the front half of my lid where I cut the crease. And I leave the outside half of my wing shape a darker shade of pink.
Step 18
I have a new love, Nude Stix Magnetic Eyeshadow Pencils. They stay on and don't budge or crease, NO MATTER WHAT! I do one eye at a time then blend, because they dry super quick. I use the shimmery white shade Sugar Bab” from the Dark Romance Eye Pencil set. I highlight the inside of my namida bukuro with this shade, then blend it with my eyeshadow brush.
Step 19
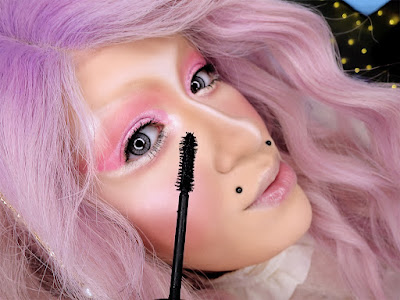
I use mascara on my top eyelashes. And I only put mascara on the inside half of my bottom lashes. I stop the line at the edge of the black limbal ring of my circle contact lenses. As a guide I do not go past the outside edge of my contact lens line. This creates a natural eye enlarging effect.
Step 20
I use Rare Beauty Liquid Eyeliner because it is a super thick brush tip liner, and super black!
Step 21
I use Tarte Surfer retractable Curl Gel Eyeliner to line the inside half of my waterline, again stopping at the outside edge of my contact lens' limbal ring.
Step 22
I use KVD Liquid Tattoo Liner to do the bottom of my eye and my inner-corner because it is super thin and sharp. The thing I like about Tattoo Liner, is that it's not super black, so perfect for mapping out placement for where you want to place your bottom lashes without it being a super dark and opaque black. You can control the opacity by depending how many times you go over the line, to make it darker each time you retrace it.
Step 23
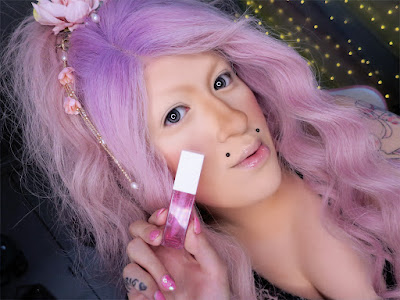
I wipe of my lip oil and use my beauty blender that still has a bit of my foundation left on it to go over my lips to create a nice solid base for my lipstick to go on top of. Then I use Fenty Beauty's Slip Shine Lipstick in shade Suga Kiss, which is a pretty baby pink shade perfect to complete this Valentine's look!
Step 24
I apply top lashes that I ordered in bulk from AliExpress. (Find link down below!)
Step 25
My bottom lashes are also from AliExpress. They are the Icy Cheer bottom lashes in style BE03. (Find link down below!)
Step 26
Lottie London's Heart Stamp eyeliner is such a fun tool to use for your Valentine's inspired look! It gives you the most perfect and precise heart stamp every time, you don't have to worry about all of the stress of drawing it even. The stamp makes it so easy! WHAT A GREAT HACK! And it even comes double ended so you can fill in any gaps in your heart or use the eyeliner pen side to draw your eyeliner!
Step 27
To add a super sexy and romantic twist to my Galentine's look, I love to use a liquid glitter liner on the inside of my namida bukuro tear bag, to give it such a pretty shimmy like tears in my eyes. For this look I used Urban Decay's Heavy Metal Glitter liner in shade Grind.
🦋 Finished Look:
🦋 Products Used:
ABH Lash Brag Mascara
Clionadh Kaleidoscope Multichrome Glitter Eyeshadow
Fenty Beauty Slip Shine Lipstick (SUGA KISS)
I Heart Revolution Tasty Strawberry 3D Highlighter
Jaclyn Cosmetics Rouge Affair Blush Palette 1
KVD Tattoo Liner Trooper Black
Lottie London Heart Stamp Liner
MCoBeauty Lip Oil
Nudestix Magnetic Eye Pencil (Sugar Baby)
Ofra Pillowtalk Highlighter
P. Louise Baseic (Winter Rose)
Rare Beauty Eyeliner
Tarte Surfer Curl Water Proof Gel Eyeliner
Too Faced Chocolate Soleil Bronzer
Urban Decay Heavy Metal Glitter Liner (GRIND)
We hope you enjoyed this post! Did you try this look?
Tag your photos with #PapillonGals for a chance to be featured in our blog!
Don't forget to spice up your phone with these exclusive phone backgrounds designed just for you!














This is so gorgeous! My fave look from Kitt <3 <3
ReplyDelete